Lesson1 : Introduction
1.
GUIDED TOUR
This exercise will guide you through the actions required to create and
run a simple two-phase flow transient pipe simulation using OLGA in a step-by-step manner. We shall
start from a basic case since hardly
anyone needs to
build a case
from scratch.
Double click on

on the desktop to initiate the Graphical User Interface (GUI).
|
|
1.1
Create a
Case
With OLGA
you may
work with
a single
simulation case
in the
GUI or
you may
gather several cases
under a common Project.

In this course, you will work in the predefined folder on the desktop where you just stored the files from the USB stick.
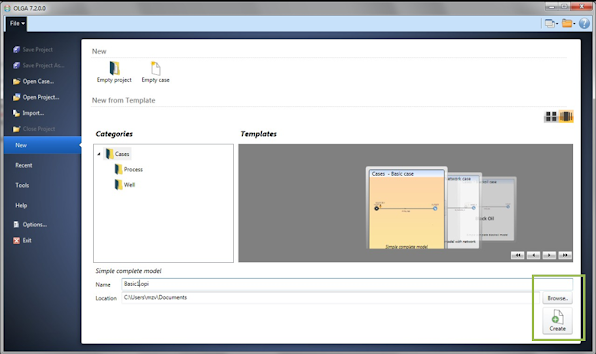
Click Browse
to locate
and select:
DesktopàFA Exercises OLGA 7.2 à Guided Tour
Select the Basic Case (first on the carousel) and then click Create:
This will
create a
complete case labelled
Basic.opi, located
in the
folder
C:\Users\User1\Desktop\FA
Exercises OLGA
7.2\Guided Tour

You will now also see the case label “Basic” on the top bar of the main GUI window.

A Project file has the extension .opp
i.e. the project file name
is Basic.opp
in this case. By opening a
project file, all other associated case files will also open. However, if
a project file should be deleted, the
case files
are maintained.

When working
in the
OLGA GUI, ensure
to save
your case
regularly.

By clicking on the Case label (Basic), you should see the case main window and you may expand/collapse the case by clicking the (+)/(-) squares.

The main
OLGA window
(also known
as the
Canvas) contains
the graphic
view of
OLGA 7
model. The
window pane
to the
left is called
“Model View”
described by
a number
of KEYWORDs.
Each element (keyword) in the Model View has a Properties window (normally to the right).
Essentially, the main structure of the model is made in the Model View, while
the detailled
modelling takes
place in the
Properties windows.

You can
learn more
about each
keyword by
selecting it
(click on
it) and
pressing F1.
A user
manual Help
Window will
appear.
For example,
if you
click on
the keyword
INTEGRATION and
F1, the
User Manual
should open
on the
relevant page:

You may want to take a closer look at the case and the concept of Project. Select the main window by clicking:
File à
Help à
OLGA Help

Click on “Contents” à “Graphical User Interface (GUI)” à ”Introduction to projects and cases”.

اضغط الزر التالي لبدء تنزيل البرنامج ...
You can download 2020 version for free as well, just click on the following button to start the download.